If you are new to sublimation, the fastest way to get frustrated is to try five different product categories before you understand one. I say that as someone who has absolutely tried to learn by making the workspace look like a craft store exploded.
My better advice: make fewer types of projects at first, but make them more than once. A beginner who makes the same blank three times and writes down what happened will learn faster than someone who makes ten random blanks once and remembers nothing except “that was stressful.”
The beginner mistake I would avoid
Do not start with the most sentimental customer photo, the most expensive blank, or the weirdest shape. Learn on replaceable blanks first. Your first test should not be grandma’s memorial ornament unless you enjoy panic as a production method.
Start with projects that teach one skill at a time: pressure, color, alignment, cropping, taping, lint control, and repeatability.
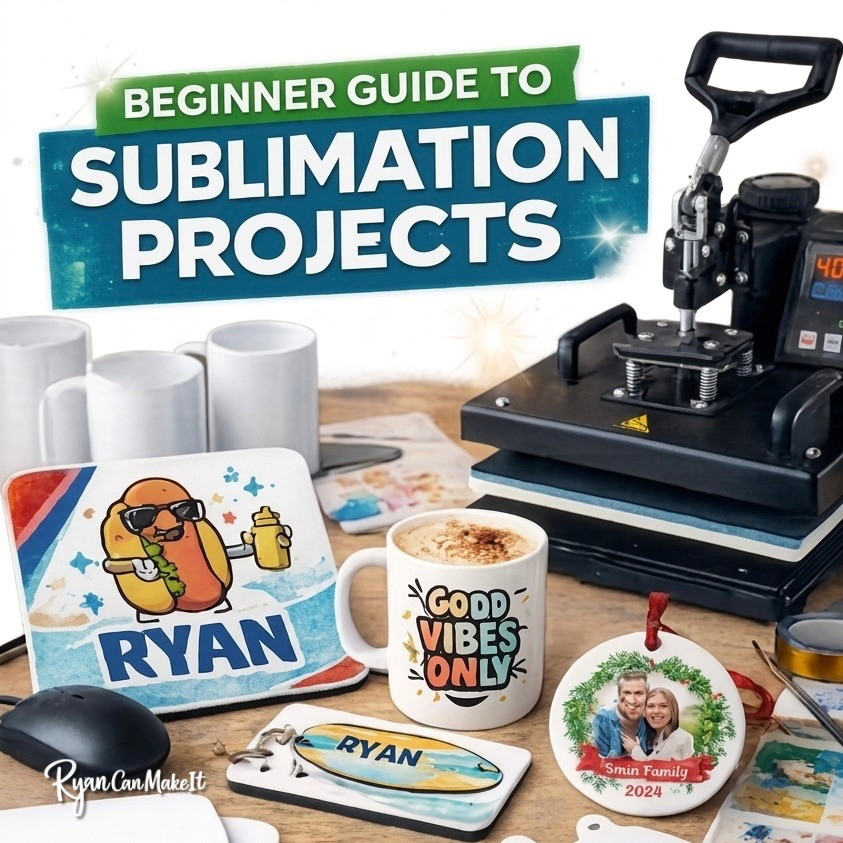
My starter order
- Mouse pad or flat fabric blank.
- Keychain or small hard blank.
- Ornament or photo blank.
- Mug after you understand taping and alignment.
- Tumbler or awkward blank after that.
This order is not about what is cutest. It is about reducing the number of ways each project can fail while you build skill.
My baseline pressing setup
For every beginner project below, I want the same basic process in place before we argue about exact settings: check the blank manufacturer’s instructions, tape the transfer so it cannot move, use protective butcher paper above and below, and put on heat gloves before removing the blank. The blank comes off the press hot, and “I only touched it for a second” is how people learn vocabulary they cannot use in a family-friendly tutorial.
If instructions are missing, many flat blanks are worth testing around 385F for 60 seconds with medium-firm pressure. On a clamshell like my Francierstudio-style press, that means adjusting the pressure knob until it closes with real resistance. On the HTVRont Auto Press 2, I usually start with max pressure. On the regular HTVRont Auto Press, pressure is not adjustable, so I often test closer to 400F if the blank can handle it.
Those numbers are not magic. They are starting points. The goal is to write down what happened so the next press is less of a guessing game.
Project 1: mouse pads
I like mouse pads for beginners because they are flat, useful, and forgiving. You can learn full-bleed design, pressure, color, and transfer handling without fighting a curve.

The flaw with mouse pads is that cheap ones can vary in surface and edge quality. If the color looks weak, do not instantly blame the printer. Check blank quality, pressure, paper, and time.
Project 2: keychains
Sublimation keychains teach small-format design discipline. Tiny text and cluttered art do not become readable because you emotionally believe in them. I have had to simplify designs more times than I wanted because what looked fine on screen looked silly on the blank.
My tip: build a template once and save it with the supplier name. Blanks that look the same online are not always the same size.
Project 3: ornaments
Ornaments are a strong beginner step because the customer use case is obvious: pets, memorials, teachers, family photos, first Christmas, kid art, new homes. They also teach cropping and emotion. A photo ornament is not just “put picture on circle.” The face placement, name, date, and hanger hole all matter.

What surprised me is how much the design template matters. Two ornament blanks can both say “round” and still need different safe zones. Save templates by supplier and blank size. Future you will act grateful for once.
Project 4: mugs
Mugs are popular, but I do not think they are the easiest first project. They are curved, and small alignment mistakes become obvious. If mugs are part of your plan, use actual sublimation mugs and consider a mug press if you will make them regularly.

Project 5: towels or fabric blanks
Fabric blanks teach material behavior. Polyester content, lint, color, texture, and customer expectations all matter. Personalized towels can work well because they are useful and giftable, but do not assume every towel blank will behave the same.

The supplies I would keep on the table
I would keep sublimation paper or A-Sub paper, heat tape, protective paper, heat gloves, and a lint roller nearby for all five project types. I recommend them because they prevent the failures I actually see: shifting, press contamination, burned fingers, lint marks, and inconsistent transfers.
What not to buy
Do not buy a giant beginner blank bundle unless you are treating it as practice only. If the blanks are random, impossible to reorder, or not products you would sell, they are not inventory. They are tuition.
Also avoid starting with dark cotton shirts if you are learning standard sublimation. That is a different conversation, and sublimation will not reward you for ignoring fabric reality.
My insider testing rule
Write this down for every test: blank name, supplier, paper, temperature, time, pressure, whether the design was mirrored, whether protective paper was used, and what you would change next time.
It sounds excessive until you get one perfect result and cannot recreate it. Then suddenly you become a note-taking person. Growth is embarrassing.
The next step I would take
Choose one flat blank and make it three times. Then choose one small hard blank and make it three times. Do not move on until you can explain what changed between tests. The goal is not to finish a cute project. The goal is to build a process you can trust.
Affiliate Disclosure: Ryan Can Make It is a participant in Amazon Affiliate and other affiliate programs. I earn a small commission from Amazon links and some other links posted on this website.